
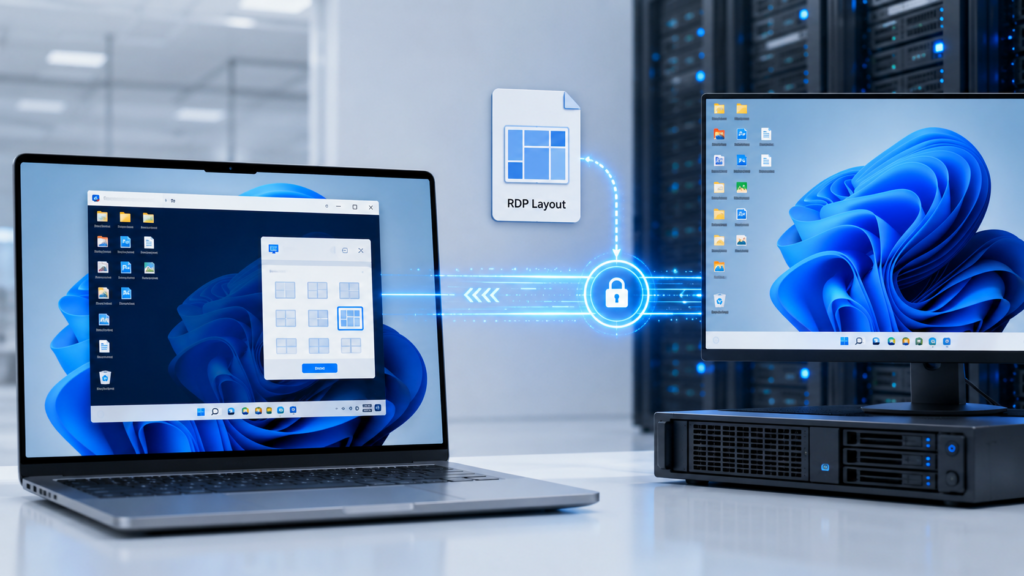
Remote Desktop sessions can change the available screen resolution, display area, scaling, and monitor configuration of a remote Windows computer. As a result, desktop icons that were neatly arranged during a local session may move, overlap, or appear in different positions after an RDP connection.
DesktopOK Remote Desktop support provides a practical way to save a dedicated icon layout for each commonly used RDP display configuration. Users can create separate profiles for full-screen, windowed, single-monitor, and multi-monitor sessions, then restore the correct arrangement whenever Remote Desktop changes the desktop workspace.
What Is DesktopOK for Remote Desktop?
DesktopOK is a lightweight Windows utility that saves the positions of desktop icons and restores them when the arrangement changes. It is particularly useful when Windows switches between different screen resolutions, display areas, or monitor configurations. The official developer confirms that DesktopOK can also save desktop icon layouts on Windows Server while connected through Remote Desktop.
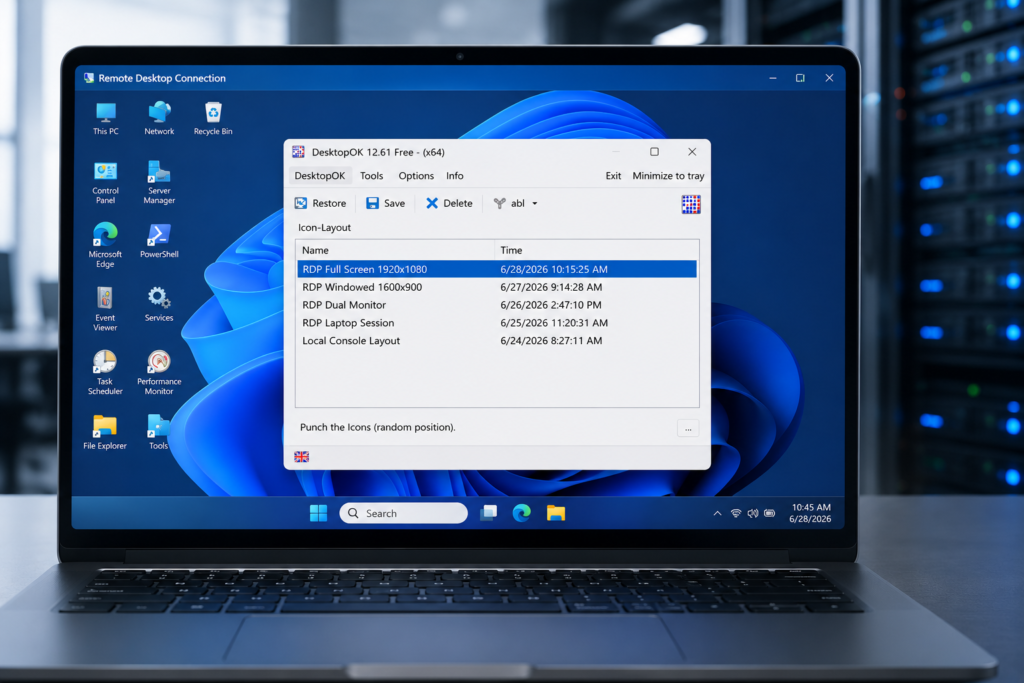
DesktopOK does not create a Remote Desktop connection and does not manage RDP credentials. It runs inside the remote Windows session and records the positions of icons displayed in that session.
For example, an administrator can connect to a Windows Server through RDP, arrange the remote desktop icons, save the layout with DesktopOK, and restore it after a later connection changes the available screen area.
Why Does Remote Desktop Rearrange Desktop Icons?
A Remote Desktop session does not always use the same display configuration as the physical monitor attached to the remote computer. The session may use the local computer’s screen size, the RDP window dimensions, a selected custom resolution, or several local monitors.
When the available desktop area becomes smaller, Windows may move icons so they remain inside the visible workspace. A later connection with a larger screen does not necessarily return those icons to their previous positions.
Common causes include:
- Connecting in a smaller RDP window
- Switching between full-screen and windowed mode
- Resizing the Remote Desktop window
- Connecting from computers with different resolutions
- Using one monitor during one session and several monitors during another
- Changing display scaling
- Enabling dynamic session resolution
- Connecting from a laptop after previously using a desktop monitor
- Disconnecting or reconnecting external displays
- Changing which display is treated as the primary monitor
Microsoft’s current Windows App can update a remote session’s resolution when its window is resized. It can also use one display, all displays, or selected displays. These settings can change the available remote desktop area and therefore affect icon positions.
Does DesktopOK Work in RDP Sessions?
Yes. The DesktopOK developer states that icon positions can be saved on Windows Server when the user connects through Remote Desktop. The developer also recommends using the latest DesktopOK release and the 64-bit edition on a 64-bit Windows Server system.
DesktopOK can be useful in RDP environments such as:
- Windows Server administration
- Remote office computers
- Virtual desktop systems
- Remote support workstations
- Home-to-office RDP connections
- Development and testing servers
- Lab computers
- Cloud-hosted Windows machines
The utility must be opened on the remote computer inside the active session. Running DesktopOK only on the local computer will save the local desktop arrangement rather than the remote one.
What You Need Before Starting
Prepare the remote session before creating a layout.
You should have:
- Access to the remote Windows computer
- DesktopOK stored on or accessible from the remote system
- Permission to run standard desktop applications
- A stable RDP display configuration
- All required desktop icons and shortcuts
- A writable folder for DesktopOK settings or layout files
- A clear name for the RDP layout profile
DesktopOK can save icon positions without administrator rights, according to the developer. This makes it suitable for many company environments where users can run approved portable applications but cannot install system-wide software.
Company security policies should still be followed before placing or running third-party utilities on managed servers.
Choose the RDP Display Configuration First
Before saving a DesktopOK layout, decide how the Remote Desktop session will normally be used.
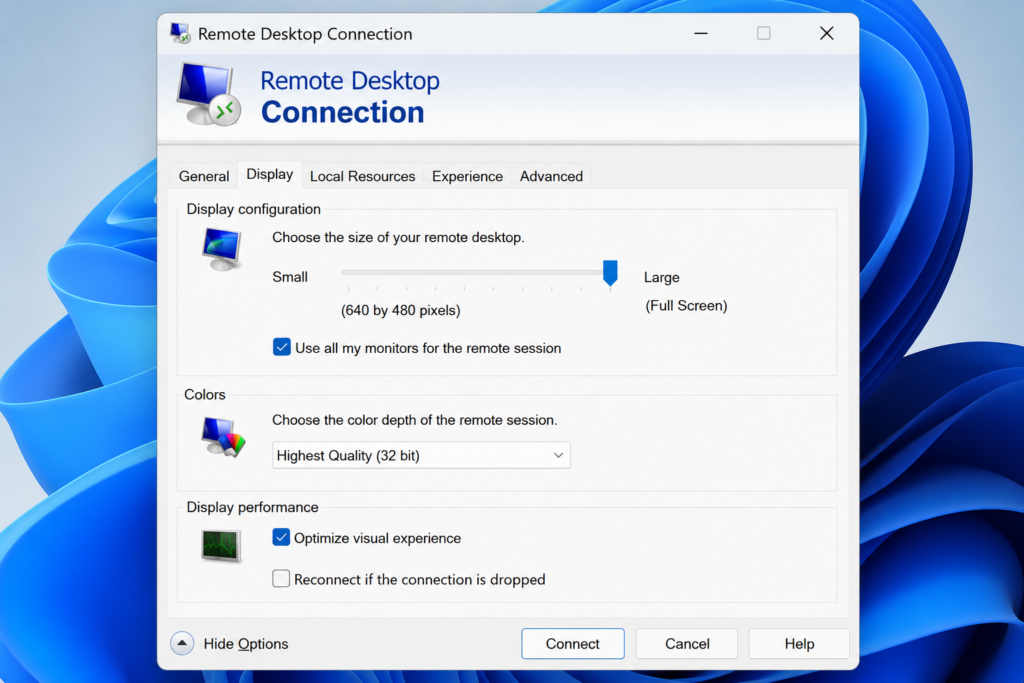
Possible configurations include:
- Full-screen on one monitor
- Windowed mode at a fixed size
- Full-screen across all monitors
- Full-screen on selected monitors
- Laptop-only session
- Desktop-monitor session
- Low-resolution support session
- High-resolution administrative session
Do not create the layout before establishing the preferred connection mode. If the layout is saved in a large full-screen session and later restored inside a much smaller RDP window, the available icon area will be different.
Using Remote Desktop Connection
In the classic Remote Desktop Connection client:
- Open Remote Desktop Connection.
- Select Show Options.
- Open the Display tab.
- Choose the required display size.
- Move the slider to Large – Full Screen when a full-screen session is required.
- Connect to the remote computer.
Microsoft documents the Display tab and full-screen slider as the method for configuring a full-screen Remote Desktop Connection session.
Using Windows App
Windows App provides display settings for single, selected, or all displays. It can also automatically update the session resolution when the connection window is resized.
When icon positions must remain consistent, use a repeatable configuration rather than changing the window size on every connection.
How to Save an Icon Layout in an RDP Session
Follow these steps while connected to the remote computer.
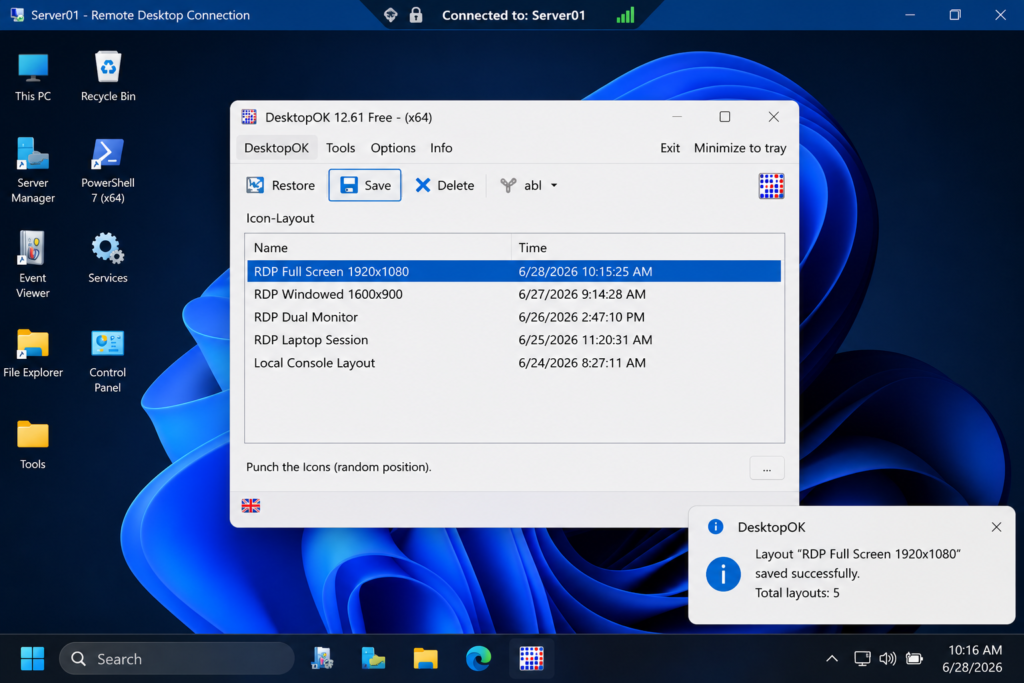
Step 1: Connect Using the Preferred Display Mode
Start the RDP session using the resolution, monitor arrangement, and window mode that will be used regularly.
For example:
- Full-screen at 1920 × 1080
- Windowed at 1600 × 900
- Dual-monitor full-screen
- Laptop session at 1366 × 768
Avoid resizing the session after arranging the icons.
Step 2: Open DesktopOK on the Remote Computer
Launch DesktopOK inside the remote session. Confirm that the program window appears on the remote desktop rather than the local desktop.
The portable edition can normally run without a traditional installation, making it easier to keep DesktopOK in a dedicated tools folder on the remote computer.
Step 3: Arrange the Remote Desktop Icons
Move the remote desktop icons into their preferred positions.
Check that:
- No icons overlap
- Important shortcuts remain visible
- Icons do not sit too close to the session edges
- Icons are placed on the intended monitor
- Temporary files are removed
- Auto arrange icons is not overriding manual placement
Leave a small amount of space near the right and bottom edges. This may reduce unwanted movement if a later session has a slightly smaller usable desktop area.
Step 4: Save the Layout
Select Save in DesktopOK.
DesktopOK will add the current icon arrangement to its saved layout list. DesktopOK supports multiple saved layouts, allowing different arrangements to be retained for different resolutions and display configurations.
Step 5: Rename the Layout Clearly
Use a name that identifies the connection type.
Examples:
RDP Full Screen 1920x1080
RDP Windowed 1600x900
RDP Dual Monitor
RDP Laptop Session
Windows Server Admin Layout
Local Console Layout
Remote Support Layout
A descriptive name makes it easier to select the correct arrangement after reconnecting from another device.
Step 6: Create an External Backup
For additional protection, export the layout as a .dok file. DesktopOK supports saving layouts to separate .dok files and loading them again later or on another computer.
A useful filename would be:
Server-RDP-FullScreen-1920x1080.dok
Store the file in a protected tools or backup folder rather than leaving the only copy on the remote desktop.
Step 7: Test the Saved Layout
Move two or three non-critical icons to different positions.
Select the saved RDP layout and choose Restore. Confirm that the icons return to the expected locations.
Testing immediately ensures the layout is valid before the session is disconnected.
How to Restore Icons After Reconnecting Through RDP
When icons move after a new Remote Desktop connection:
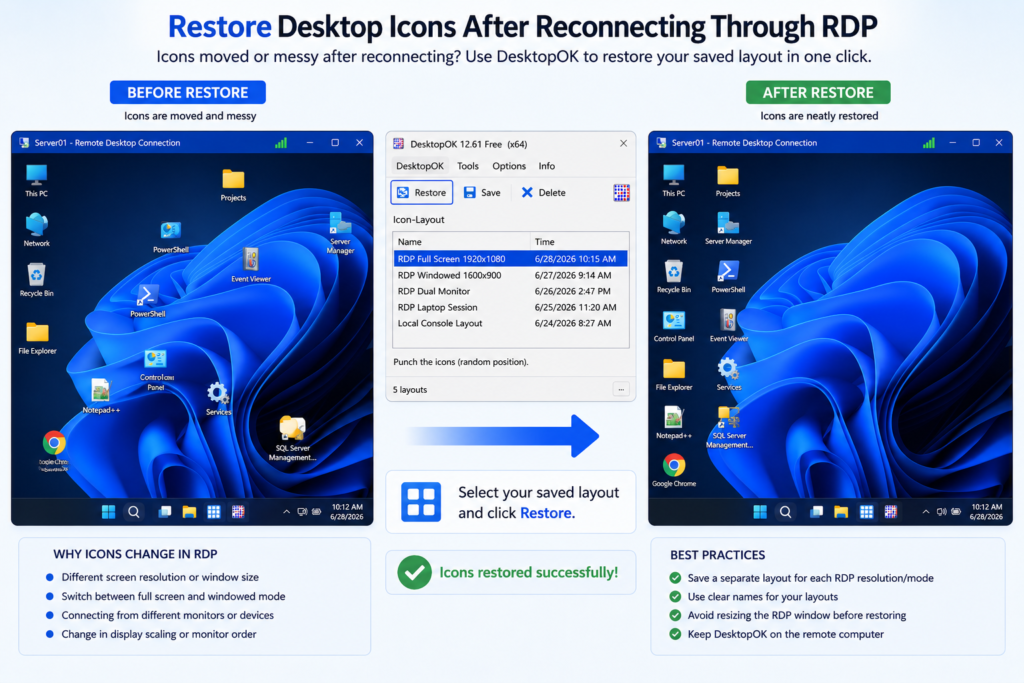
- Connect using the same display mode used when the layout was saved.
- Avoid resizing the RDP window.
- Open DesktopOK on the remote computer.
- Select the matching RDP profile.
- Click Restore.
- Check the desktop for missing or overlapping icons.
- Save a new profile only when the restored arrangement is correct.
The selected DesktopOK profile should match the current session configuration as closely as possible.
For example, do not restore a dual-monitor profile in a small single-monitor window unless no matching single-monitor layout exists.
Create Separate Layouts for Local and Remote Sessions
A single saved layout may not work well for every connection type. The physical console and RDP session can have different usable screen areas even when they appear to use similar resolutions.
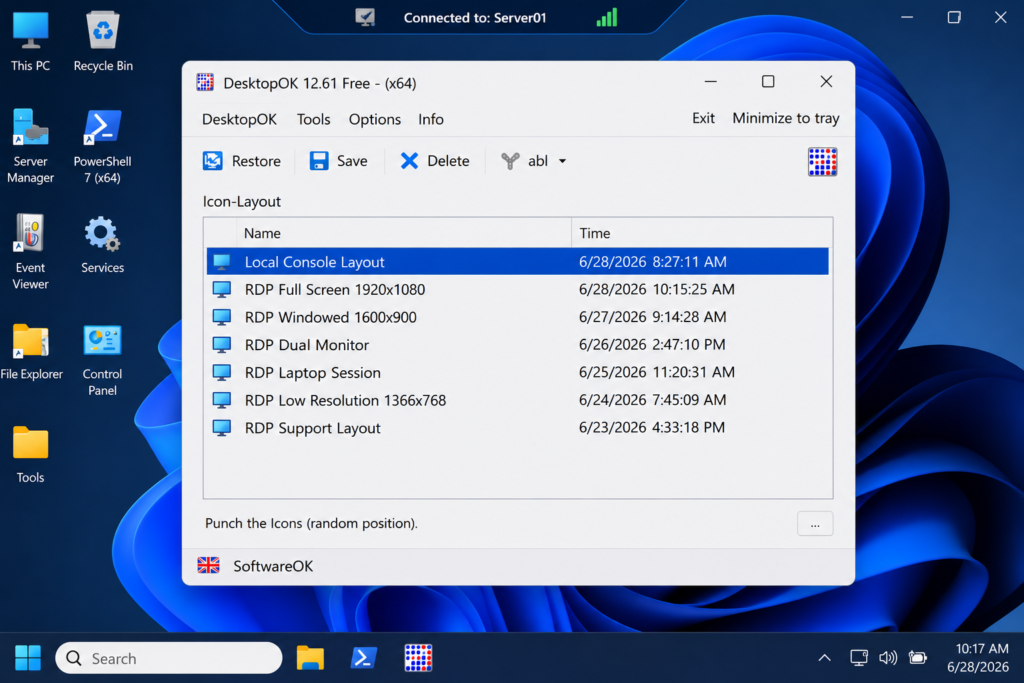
Create separate layouts for:
Local Console Layout
Use this profile when working directly on the computer or server with its attached monitor.
RDP Full-Screen Layout
Use this profile for a Remote Desktop session occupying one complete local display.
RDP Windowed Layout
Use this profile when the remote session runs inside a smaller resizable window.
RDP Multi-Monitor Layout
Use this profile when Remote Desktop spans two or more local monitors.
RDP Laptop Layout
Use this profile when connecting from a smaller notebook display.
Emergency Support Layout
Use a compact arrangement that keeps important administrative tools visible during low-resolution support sessions.
Multiple layouts prevent one display mode from repeatedly overwriting or disturbing another arrangement.
DesktopOK with Multiple RDP Monitors
Microsoft’s Remote Desktop clients can support multiple displays. Microsoft instructs users to enable Use all monitors and Full screen for connections that should occupy two or more screens.
When saving a multi-monitor RDP layout:
- Use the same number of local monitors each time.
- Keep the monitors in the same physical order.
- Use the same primary display.
- Keep display scaling consistent.
- Use the same connection client where possible.
- Save a separate profile for single-monitor sessions.
- Avoid disconnecting a monitor during the session.
A profile created across two monitors may compress or reposition icons when restored in a one-monitor session.
DesktopOK on Windows Server
DesktopOK can be used during Remote Desktop connections to supported Windows Server environments. The developer specifically recommends the 64-bit DesktopOK build for Remote Desktop use on a 64-bit Microsoft Server operating system.
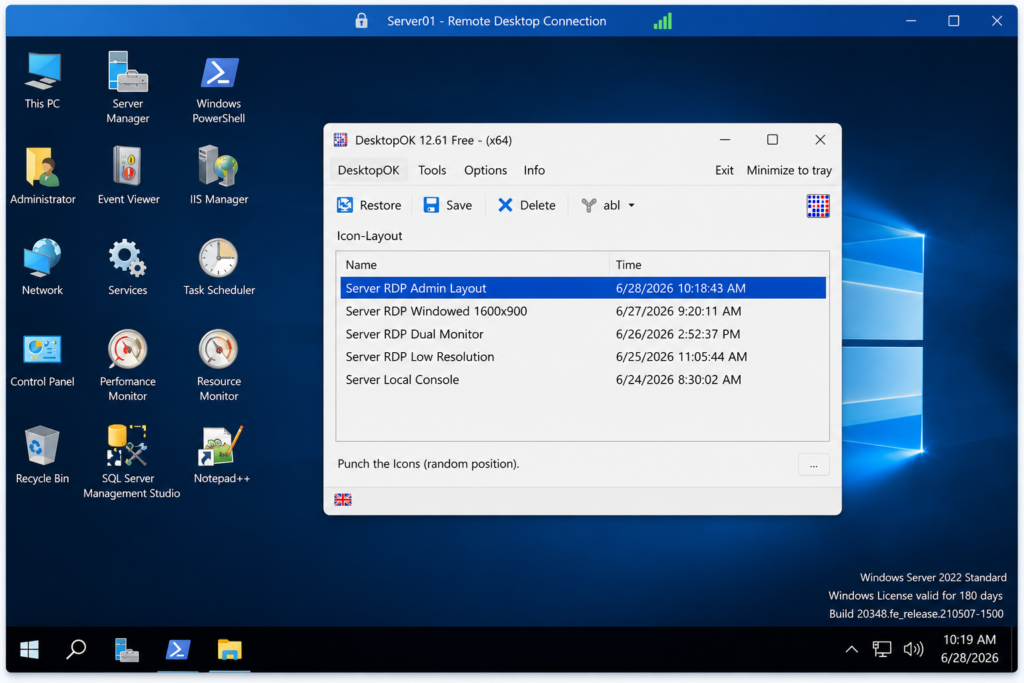
A practical server setup is:
- Create a dedicated utilities folder.
- Place the current DesktopOK executable in that folder.
- Run it inside the administrator’s RDP session.
- Save separate layouts for common connection sizes.
- Export important profiles as
.dokfiles. - Keep backups outside the desktop folder.
- Update the utility after verifying a newer official release.
DesktopOK should not replace normal server backup, profile management, Group Policy, or Remote Desktop administration tools. It is specifically useful for retaining and restoring icon positions.
Using DesktopOK Without Administrator Rights
DesktopOK’s developer states that icon positions can be saved without administrative rights.
This can be helpful for:
- Standard company user accounts
- Restricted RDP profiles
- Managed remote workstations
- Shared training systems
- Virtual desktop users
- Support staff without server-wide permissions
However, the program still needs permission to run and write its configuration or backup data.
When DesktopOK cannot save changes, check whether its folder is read-only or located in a protected directory. A writable user folder is generally more suitable than a restricted system directory.
What to Do When DesktopOK.ini Does Not Save
DesktopOK normally uses its configuration to retain settings and saved layout information. In some restricted environments, the application may be unable to write successfully to DesktopOK.ini.
The official developer provides an optional registry-based mode: renaming the executable to DesktopOK_reg.exe causes the program to store settings under the current user’s registry area at:
HKEY_CURRENT_USER\Software\SoftwareOK.de\DesktopOK
This method is suggested by the developer when saving to DesktopOK.ini causes problems.
Use this option only when:
- Normal layout storage does not persist
- The application folder is not writable
- Registry storage is allowed by company policy
- The change has been approved by the system administrator
Because the data is stored under the current user, another Windows account may not automatically see the same saved layouts.
DesktopOK Does Not Restore RDP Icons Correctly
Several conditions can prevent an RDP layout from restoring as expected.
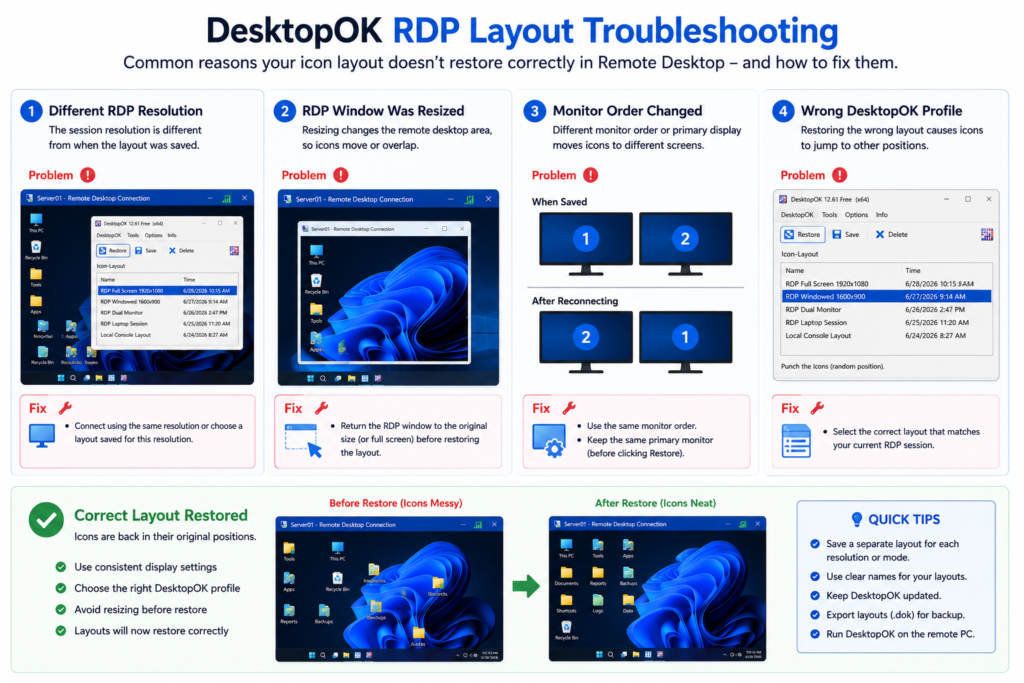
The RDP Resolution Is Different
A profile saved in a large session may not match a smaller session.
Reconnect using the original resolution or select a profile created for the current display size.
The Remote Desktop Window Was Resized
Windows App can update the remote session’s resolution when its window is resized. This changes the available desktop area.
Return the session to its original dimensions before restoring the layout.
The Wrong Profile Was Selected
Check the profile name carefully. A local, windowed, full-screen, and dual-monitor profile may contain very different positions.
The Monitor Order Changed
Confirm that the monitors are arranged in the same order and that the correct display is selected as primary.
Icons Are Missing
DesktopOK restores the positions of available icons. It does not recreate shortcuts, folders, or documents that have been deleted.
Restore or recreate the missing desktop items before loading the layout again.
Auto Arrange Icons Is Enabled
Right-click the remote desktop and open View. Disable Auto Arrange Icons when manual icon positioning is required.
DesktopOK Was Opened Locally
Make sure DesktopOK is running inside the remote session. A local DesktopOK window manages the local computer’s icon layout.
The Layout Disappears After Closing DesktopOK
Check whether the DesktopOK folder is writable. Consider saving the profile as a .dok file or using the developer’s registry storage method when permitted.
Full-Screen Mode Does Not Return
The classic Remote Desktop Connection client stores display settings in its RDP configuration. Microsoft recommends opening the Display tab and moving the display configuration slider to Large – Full Screen when the session does not maximize correctly.
Recommended Naming System for RDP Layouts
Use a consistent naming pattern:
Computer-ConnectionMode-Resolution-Monitors
Examples:
OfficePC-RDP-FullScreen-1920x1080
Server01-RDP-Windowed-1600x900
Workstation-RDP-DualMonitor
Server02-LocalConsole
OfficePC-RDP-Laptop-1366x768
When exporting to .dok, add the date:
Server01-RDP-FullScreen-1920x1080-2026-07-28.dok
Clear names reduce the risk of restoring the wrong profile.
Best Practices for Reliable RDP Layouts
For consistent DesktopOK Remote Desktop results:
- Run DesktopOK on the remote system.
- Save the layout after establishing the final RDP display mode.
- Create separate profiles for local and remote sessions.
- Create separate full-screen and windowed profiles.
- Use matching monitor order and display scaling.
- Avoid resizing the session before restoration.
- Test each layout immediately after saving it.
- Export important profiles as
.dokbackups. - Use clear profile names.
- Keep DesktopOK in a writable folder.
- Follow company security policies.
- Use the current official DesktopOK release.
- Do not treat a layout file as a backup of actual desktop files.
Common DesktopOK RDP Use Cases
Remote Server Administration
Administrators can keep shortcuts to management consoles, logs, scripts, and monitoring tools in predictable positions.
Work-from-Home Connections
Employees connecting from different laptops and monitors can maintain separate layouts for each setup.
Remote Support Systems
Support technicians can restore a standard desktop arrangement after using low-resolution or windowed sessions.
Virtual Machines
Users can save layouts for full-screen and smaller console or remote connection modes.
Training and Computer Labs
Standard desktop arrangements can be restored after sessions change screen settings or move icons.
Development Servers
Developers can organize shortcuts to terminals, project folders, documentation, and testing tools.
Frequently Asked Questions
Can DesktopOK save icons during a Remote Desktop session?
Yes. The official developer confirms that DesktopOK can save desktop icon positions on Windows Server while the user is connected through Remote Desktop.
Should DesktopOK run on the local or remote PC?
Run DesktopOK on the remote PC inside the active RDP session. Running it locally will manage the local computer’s icon arrangement.
Why do my icons move after an RDP connection?
Remote Desktop may use a different resolution, window size, monitor count, scaling level, or usable desktop area. Windows may reposition icons to keep them visible.
Do I need a separate RDP layout?
A separate RDP profile is recommended when the remote session uses a different display area from the physical console.
Can I create several RDP layouts?
Yes. DesktopOK supports multiple icon-layout profiles for different resolutions and monitor configurations.
Does DesktopOK require administrator rights?
The developer states that DesktopOK can save icon positions without administrator rights, although application execution and storage must still be permitted.
Can DesktopOK work on Windows Server?
Yes. The developer documents DesktopOK use on Microsoft Server systems and recommends the 64-bit edition for Remote Desktop use on 64-bit Windows Server.
Can a layout be transferred between servers?
A layout can be exported as a .dok file and copied, but successful restoration depends on matching icons, resolutions, monitor arrangements, and user environments.
Why does the layout change when I resize the RDP window?
Some Remote Desktop clients dynamically update the session resolution when the window is resized. This changes the desktop workspace used for icon positioning.
Can DesktopOK restore deleted shortcuts?
No. DesktopOK restores positions for existing desktop icons. It does not recreate deleted files, folders, programs, or shortcuts.
Should I save a local-console profile too?
Yes. A local-console profile protects the arrangement used when someone works directly on the remote computer.
What should I do if DesktopOK.ini does not save?
Move DesktopOK to a writable folder. When permitted, the developer also provides an optional registry-based mode by renaming the executable to DesktopOK_reg.exe.
Conclusion
DesktopOK Remote Desktop support helps maintain an organized desktop when RDP connections change the resolution, monitor configuration, scaling, or available workspace of a remote Windows computer.
The most reliable approach is to save separate DesktopOK profiles for full-screen, windowed, multi-monitor, laptop, and local-console sessions. Match the current RDP configuration with the correct saved profile, keep external .dok backups, and test every important layout before relying on it for remote work or server administration.